General Tips - Melee
- Ale is absolutely busted. With 10% melee damage, 10% melee speed, 10% movement speed, and 10% melee crit, it’s certainly worth the tiny 4 defense penalty.
- Magma Stone is literally free 15 extra DPS on all melee attacks. I recommend getting it as soon as you can kill Hellbats- the low drop chance is 100% worth it.
General Tips - Ranged
- While a bit pricey, the Ammo Box conserves a lot of time, money, and resources. It’s sold by the Arms Dealer now.
- I know it seems obvious, but having autofire on not only reduces chance of carpal tunnel, but it actually improves DPS as well.
General Tips - Mage
- As soon as you can find one, a Star Statue on a Timer supplies a surprising amount of extra consistency and DPS during bossfights, sometimes even rendering Mana Potions obsolete.
- Get the Star Fruit (whatever it’s called again, the Mana Crystal in Shimmer upgrade) as soon as possible- the extra mana regeneration is actually noticeable.
General Tips - Summoner
- On CelebrationMK10 and GetFixedBoi worlds, the Wizard Hat grants an additional minion slot. Get it as soon as possible. Also keep in mind that the Bewitching Table can sometimes spawn above the Dungeon Guardian depth on Drunk and GetFixedBoi seeds.
- Learning how to consistently defeat Queen Bee, Dreadnautilus, and Empress of Light is a godsend, as they grant access to the most essential gear for summoners.
- Whip Stacking is extremely potent and only gets more potent as you progress. I heavily advise doing it as soon as you learn how to swap weapons on the fly.
King Slime

Summoned with a Slime Crown or can spawn after defeating 150 slimes in the Slime Rain event, can also spawn rarely on the outer edge of the world
King Slime is a giant slime with 2,000 / 2,800 / 3,570 health. It can teleport to the player if he gets trapped or if the player gets out of his reach for too long.
King Slime does not provide weapons or good armor, but does drop two main things; the Slimy Saddle, a great mount for bossfights and mobility, and a decent amount of money. Note that King Slime can summon Spiked Slimes (literally slimes that fire a burst of spikes upwards) on Expert and Master Mode, which can easily stunlock a player if they’re cornered. Keep in mind that Spiked Slimes cannot fire spikes if they are floating on water or falling.
Melee Tips
- If Eye of Cthulhu has already been defeated, the Shield of Cthulhu’s ramming is a great way to deal free damage with short range weapons. This is especially effective with the Blood Butcherer due to its DoT effect, making consistent hits less needed.
- Another tactic is to stand really close to the boss while spamming Blade of Grass, and move far away enough that the slime consistently jumps over you right into your sword and Razor Leaf. King Slime, unlike Golem, cannot control its jump height or jump length. Just keep in mind that this leaves you open to slimes falling onto you if King Slime releases them right above you.
- Ancient Shadow or Platinum Armor is the best at this stage. If you have it, the Gi is a very good thing to have as well, but keep in mind that it does have a bit less defense.
Ranger Tips
- Boomstick, Musket, or Undertaker are all great options. Minishark may be a tad bit expensive at this stage, but it also works if you can afford it.
- Platinum or Demon/Tendon Bow with Jester’s Arrows also works really well. As an added bonus, unlike the guns, it takes care of the slimes pretty easily. However, it does deal less raw damage to the boss itself.
- Fossil Armor is the best armor for rangers at this stage. You could also alternatively use Ancient Shadow Armor if you’re worried about mobility and defense. The Gi is another option, but I wouldn’t recommend it unless it’s the only thing you have.
Mage Tips
- Vilethorn deals really good damage due to it lingering and covering a large area that King Slime consistently lands in. The Diamond Staff also works for its limited piercing properties and for its longer range.
- Putting up a Crimson Rod never hurts, either. Also make sure to take a break every so often to regenerate mana. If you have them, Mana Potions are another option.
- The ideal armor at this stage is either the Jungle Armor or the Wizard Hat and Diamond Robe. The Ancient Shadow Armor could be used if you care more about mobility and defense, but I wouldn’t recommend it because of the lack of mana boosts.
Summoner Tips
- The Vampire Frog Staff and the Snapthorn are the ideal weapons here. The Flinx Staff or Abigail’s Flower also work, but not as well.
- Make sure you stay a decent distance away from the King Slime as much as possible- with your low defense, if you get stunlocked inside the boss, you’re dead in a matter of seconds.
- The ideal armor at this stage is the Wizard Hat if on Celebration or Zenith seed or Jungle Hat if on any other seed, Flinx Fur Coat, and Jungle Pants.
Eye of Cthulhu
Summoned with a Suspicious Looking Eye at night or can spawn naturally at night after obtaining <200 life and <10 defense.
The Eye of Cthulhu is a huge eyeball with 2,800 / 3,640 / 4,641 health. This is generally the first boss a player must face. It alternates between summoning three Servants of Cthulhu and lunging a few times.
In second phase, it only performs lunges. Note that on Expert and Master Mode, the boss performs dash chains in second phase, becoming more frequent and aggressive as it loses health.
Eater of Worlds
![]()
Summoned by using Worm Food in the Corruption or by breaking 3 Shadow Orbs.
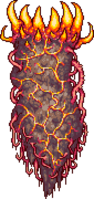
The Eater of Worlds is a big corrupt snek with 10,050 / 15,120 / 19,224 HP.
Eater of Worlds is a large worm enemy (uses Worm AI) that travels through tiles, and is made up of multiple sections that can each attack separately when cut off. To defeat it, every section must be brought down to less than two body parts to be killed (the smallest possible section is a head and a tail with no body pieces). Due to how helpful Corruption gear is, this boss is actually basically required to at least fight in order to progress through Pre-Hardmode, due to Shadow Scales.
Note that on Expert and Master Mode, it can fire Vile Spit from all body segments while above ground.
Brain of Cthulhu
Summoned with a Bloody Spine in the Crimson or by breaking 3 Crimson Hearts.
The Brain of Cthulhu is a big brane with a mere 1,250 / 2,125 / 2,709 health. Note that this does not count the Creepers.
The Brain of Cthulhu has two forms. In the first form, the brain cannot be damaged, and Creepers (flying eyeballs) will float around it, occasionally ramming the player and inflicting multiple debuffs. After all of these are killed, the Brain of Cthulhu will go into its second form, where it will teleport more frantically and move a lot faster. The Brain of Cthulhu’s second form attacks by ramming into the player. Unlike most other bosses, the Brain of Cthulhu is not immune to knockback, so consistent weapons are key. As with Eater of Worlds, Brain of Cthulhu is basically required to fight in order to progress due to Tissue Samples.
Note that on Expert and Master Mode, in the Brain of Cthulhu’s second phase, it will start creating illusions of itself to charge at the player. The lower the Brain of Cthulhu’s HP gets, the less obvious the illusions become, to the point where they will look exactly like the real Brain of Cthulhu.
Queen Bee
Summoned with an Abeemination in the Jungle or by breaking its Larva
Queen Bee is an enormous bee with 3,400 / 4,760 / 6,069 health.Queen Bee alternates between charging at the player, hovering above them while spawning Bees, and moving left and right while shooting stingers. Note that in Expert and Master Mode, she gets more aggressive and faster as her health lowers. The fight is definitely worth it for all classes, but especially for summoners due to Bee Armor and the Witch Doctor.
Skeletron

Summoned by activating the Old Man’s curse at night or by killing the Clothier with a Clothier Voodoo Doll equipped
Skeletron is a sans ripoff with 4,400 / 8,800 / 11,220 health and two hands. It is summoned by speaking to the Skeletron will alternate between attacking the player with its hands and performing a spinning attack.
Defeating Skeletron will stop Dungeon Guardians from spawning, allowing free access to the Dungeon and access to all dungeon loot and enemies.
In Expert and Master Mode, Skeletron’s head gains 20 defense for every hand still alive. Once at least one hand is destroyed, it will start shooting homing skulls at the player. It is also much faster. Its hands inflict Slow, and its head inflicts Bleeding. If the player gets caught by its head-spin attack, Skeletron can “stun-lock” them, a lethal situation that can only be escaped by high mobility, e.g. with a hook. Note that the boss’s drops aren’t useful at all, but it is required in order to spawn the Cultists in Hardmode. As such, the boss is required to beat the game.
Deerclops

Summoned with a Deer Thing in the Tundra, or can spawn naturally at midnight during a Blizzard if at least one player in the world has at least either 9 defense or 200 health.
The Deerclops is a walking moose with 7,000 / 11,900 / 15,172 health.
Deerclops has four attacks:
- If it is close to the player, the Deerclops will smash the ground, summoning a wave of ice spikes that quickly travels torwards them. Every third consecutive wave does not go as far, but spreads in both directions. Note that this attack inflicts Chilled and Frozen.
- If it is not close enough to its target to use its ice spikes attack, the Deerclops will ‘scoop’ and then throw numerous chunks of debris into the air that fall back down. These ice chunks can pass through blocks. Note that this attack inflicts Chilled and Frozen.
- The Deerclops will occasionally stand in place and roar, inflicting Slow on all players for 12 seconds / 24 seconds / 30 seconds.
If the player is above the Deerclops for too long, it will summon five shadow hands around the player.
Note that Deerclops can pass through solid blocks, but will quickly rise to the top of said blocks unless the player is below it.
If the player is more than 30 tiles away from it, the Deerclops will turn a dark shade purple and become immune to damage.
If the Deerclops is very far away from the player, it will wander back and forth without directly seeking the player. It doesn’t ever despawn unless the player exits the world (not sure if this is a bug or not).
In Expert and Master Mode, shadow hands will be periodically summoned that either move forwards slowly, move forwards quickly and curve, or spin in place. Shadow hands are summoned more frequently as the Deerclops’ life gets lower. Note that they have no telegraph and deal damage as soon as they spawn, as well as predicting the player’s movements. The boss’s items are actually pretty good, though I would advise fighting it right after EoW/BoC rather than Skeletron.
Wall of Flesh
Summoned by throwing a Guide Voodoo Doll into lava in the Underworld while the Guide is alive
The Wall of Flesh is a column of internal organs that spans the entire world height. It has 8,000 / 11,200 / 14,280 health.
Upon summoning the Wall of Flesh, the player will be afflicted with Horrified, which prevents fleeing from the battle – any attempt to do so will result in severe damage via The Tongue or instant death if the player tries to teleport away, and the debuff will not be removed until either the player or the Wall of Flesh is killed. The Wall of Flesh will then sweep across the map, moving faster as its HP gets lower. It must be killed before it reaches the end of the map, otherwise it will despawn and any players in the Underworld will instantly die. Additionally, the Wall of Flesh’s eyes fire lasers, with the rate of fire increasing as it takes damage. Its mouth burps Leeches (worms that have a high chance to drop Hearts) that will chase the player, and it has small mouths attached to it called The Hungry (note that their chain breaks and fly at the player when killed), which will also move toward and damage the player.
In Expert and Master Mode, the Wall of Flesh will greatly increase its movement speed as its health decreases, eventually surpassing even players using Terraspark Boots in movement speed. The Hungry will rapidly respawn, thus seemingly blocking the wall from attacks, and can deal significant damage themselves. Note that the boss is required to gain access to Hardmode, and as such is a required boss. Its drops are also very good for dealing with early Hardmode.
Queen Slime

Summoned with a Gelatin Crystal in the Hallow
Queen Slime is a giant crystal blob with 18,000 / 28,800 / 36,720 health. She is available to battle at the start of Hardmode. Note that she is an optional boss fight and is a small gap to challenge before facing the mech bosses, warranting equipment upgrades and other items. in the game. As she takes damage she spawns Crystal Slimes (spiked slimes with more upwards range), Bouncy Slimes (slimes that fire bouncy pink gelatins at the player), and Heavenly Slimes (literally just flying slimes) to aid her. While her first form is straightforward, with only normal hops, Queenly Smashes that create a small shockwave, and standing still while firing bursts of Regal Gelatins, the second phase poses much more of a threat as the boss begins to fly in the air, shooting bursts of Regal Gelatins from above and plunging back down to try to ram the player. There are no Expert or Master Mode changes as far as I know. Its gear, specifically the Hook of Dissonance and the Gelatinous Pillion, are quite useful for the rest of the game, and the Crystal Assassin armor is definitely worth getting for mixed class.
The Twins
Summoned with a Mechanical Eye at night, can also naturally spawn at night after a Evil Altar has been smashed
The Twins are the American versions of the Eye of Cthulhu. They exist as two individual entities, known as Retinazer and Spazmatism, with the former having 20,000 / 30,000 / 38,250 health and the latter having 23,000 / 34,500 / 43,987 health.
The two individual eyes have different fighting styles. Retinazer focuses on shooting the player with Death Lasers. Note that these lasers tend to be a bit inaccurate. After firing lasers, it lunges at the player a few times. Once its health is low enough, it will transform into its second form, replacing its pupil with a laser cannon and raising its defense by 20. During this form, it alternates between hovering above the player and slowly firing high damage, high velocity lasers, and hovering to the player’s left while rapidly firing low damage lasers.
The other eye, Spazmatism, alternates between hovering to one of the player’s sides and firing balls of Cursed Flames, and performing small, quick lunges. Once its HP is low enough, it will transform into its second form, resembling a mechanical version of the Eye of Cthulhu’s second form. It now deals a ton more damage, gains 20 defense, and fires a Cursed Flamethrower instead of balls of Cursed Flames. The last twin destroyed will drop all of the loot. The main mentions are Hallowed Bars and Souls of Sight, which are used to craft multiple weapons, such as the Rainbow Rod, the Magic Harp, and the Optic Staff, and the Hallowed Armor.
In Expert and Master Mode, Retinazer will shoot lasers faster, and Spazmatism charges faster in its second form. Note that this boss is needed to summon Plantera Bulbs, and as such is a required boss.
Destroyer
![]()
Summoned with a Mechanical Worm at night and can spawn naturally at night after an Evil Altar is smashed
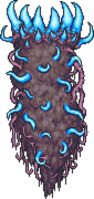
The Destroyer is the american version of Eater of Worlds with 80,000 / 120,000 / 153,000 health. Although it is similar to its pre-Hardmode counterpart, the Eater of Worlds, it has some key differences: it will not divide into smaller segments, will shoot lasers from its body if space is available, and each segment has a 4% chance to release a Probe if hit.
The Destroyer will shoot Death Lasers, increasing in attack speed as it loses health.
In Expert and Master Mode, The Destroyer’s head can deal damage as high as 280 / 420, crippling the player if they are hit head-on. Note that the boss is needed to summon Plantera Bulbs, so this is a required boss. The main drops of interest are Hallowed Bars and Souls of Might, which are used to make multiple weapons, such as the Megashark and the Light Disc, and the Hallowed Armor.
Skeletron Prime

Summoned with a Mechanical Skull at night or can naturally spawn at night after an Evil Altar is defeated
Skeletron Prime is the american version of Skeletron, with the head alone having 28,000 / 42,000 / 53,550 health. Instead of two hands, it has four limbs – the Prime Vice, Prime Laser, Prime Saw, and Prime Cannon. With the head and all limbs combined, Skeletron Prime has 59,000 / 88,500 / 112,836 HP. Note that only the head has to be defeated, but killing the limbs makes the fight significantly easier. It is more mobile than its predecessor, and it regularly flies off-screen, making targeting more difficult. It is also worth noting that when its head spins, its defense actually doubles from 24 to 48, unlike Skeletron, whose defense is dropped to 0. The Prime Limbs also become much more aggressive and fire/attack faster and more frequently.
The main drops are Hallowed Bars and Souls of Fright upon being defeated, which are both used to craft multiple items, the main ones being the Flamethrower and the Hallowed Armor.
In Expert and Master Mode, Skeletron Prime moves significantly faster during its spinning attack. Note that killing it is needed to spawn Plantera Bulbs, so this is a required boss.
Plantera

Summoned by destroying a Plantera’s Bulb
Plantera is a big flower with 30,000 / 42,000 / 53,549 health. If the player exits the Underground Jungle, Plantera becomes “enraged”, gaining a significant boost to her stats and speed. Needless to say, don’t enrage her.
Plantera has two phases. In her first phase, she clings to solid tiles using her Plantera’s Hooks and fires Seeds, Poison Seeds (literally the same but more damage and inflicts Poison), and Spiky Balls (bounce on solid tiles, deal high damage). In her second form, Plantera has increased speed and moves more aggressively torwards the player. She will also release numerous “Plantera’s Tentacle” minions that are attached to her main body. She stops firing seeds and begins firing Spores, which home in on the player’s X-position and constantly fall.
In Expert and Master Mode, the seeds can go through walls and have slight homing, and extra Plantera’s Tentacles are attached to each hook (3 on each) in her second phase, adding 9 tentacles in total. Additionally, the Spiky Balls home in on the player’s X-position as well.
Once Plantera is defeated, the Dungeon will begin spawning new, stronger enemies, and more varieties of loot can be dropped. Additionally, the spread of Crimson, Corruption and Hallow is slowed by 50%. Golem can also be summoned, and Prismatic Lacewings begin spawning in the Hallow at night. As such, defeating this boss is required to advance.
Golem
Summoned by using a Lihzahrd Power Cell at a Lihzahrd Altar
Golem is a big rock boi with a combined total of 60,000 / 90,000 / 114,749 health.
Golem has two phases. During the first phase, its two fists and its head can be attacked. Destroying the fists is not needed, but can be helpful. Note that on harder difficulties, the sheer power of the fists in the second phase warrants targeting them first. Once the head’s health is depleted, it begins flying above the body while shooting fireballs and eye beams, leaving the body open to attack. The body will jump around like crazy during this phase. Defeating the body will defeat Golem. Fists cannot be deflected and glow before punching. Note that an arena within the jungle is required, as the boss enrages and becomes dramatically more aggressive and faster when not in the Jungle biome. The Cultists will only spawn after Golem is defeated, so this is a required boss.
Duke Fishron

Summoned by fishing in the Ocean with the Truffle Worm as bait
Duke Fishron is your father who left to go get milk with 60,000 / 78,000 / 99,000 health. In his first stage, Duke Fishron will attempt to ram the player five times before either firing explosive bubbles or summoning Sharknados the attack cycle is as such;
five lunge > bubbles > five lunge > sharknado
Note that during phase transitions and upon spawning, Duke Fishron is immune to all damage and all summon targeting and homing projectiles are disengaged.
In his second stage, Duke Fishron gains glowing eyes and a boost to attack and defense. His ramming attacks become faster and have less delay, but there are only three instead of five, instead of shooting bubbles directly at the player, he flies quickly around in circles, sending bubbles everywhere. Note that the bubbles still home. Instead of summoning Sharknados in this stage, Duke Fishron summon a single larger Cthulhunado. These remain in place a longer time than Sharknados, fire more Sharkrons, fire stronger Sharkrons, deal much more damage, and are much taller and larger as a whole. The new attack pattern is as such;
three lunge > bubbles > three lunge > cthulhunado
In Expert and Master Mode, when Duke Fishron drops below 15% HP, he enters his third phase. In this phase, the screen turns dark, Duke Fishron becomes invisible, and only his glowing eyes are visible. He cycles through;
one dash > teleport > two dash > teleport > three dash > teleport
Note that it only teleports to either the upper right or the upper left of the player. No other attacks are performed during this phase.
Note that the weapons and wings it drops are extremely powerful and can technically be obtained at the start of Hardmode. It’s definitely worth a fight, especially for mages and rangers.
Empress of Light
Summoned by killing a Prismatic Lacewing
The Empress of Light is a giant maniac rainbow butterfly queen with 70,000 / 98,000 / 124,950 health. This boss is meant to be a small gap in between Plantera and Golem, but can be fought later or skipped altogether, as it is an optional fight. She cycles through multiple attacks;
Prismatic Bolts - Summons a cloud of prismatic bolts that home in on the player after a short delay. These bolts do not have perfect tracking, and will miss if the player makes a sharp turn as they approach.
Prismatic Bolts 2 - Fires prismatic bolts in a clockwise spiral, which behave identically to those used in the first variant of the attack. This version is harder to dodge, and when she is enraged she summons more bolts.
Dash Attack - Positions herself to the left or right of the player before charging horizontally in the player’s direction. This attack is additionally preceded by a sound effect and several images of the Empress spinning around her right before she dashes. She briefly becomes invincible during the attack, removing any Daybreak spears attached to her and targeting from whips.
Sun Dance - Hovers above and slightly to the left of the player and emits 6 persistent rays of light (8 if enraged) that slowly rotate clockwise around her. 3 sets of rays are created per sun dance, each positioned slightly further clockwise than the last.
Everlasting Rainbow - Releases a ring of 13 stars that slowly spiral out clockwise from her original position, then spiral back inward in the same direction. These stars leave behind a trail of light that will damage the player.
Ethereal Lance - Summons a swarm of swords that launch in the direction the player was headed when they were summoned, telegraphed by colored beams. These swords are summoned behind where the player was moving, or all around the player if they were stationary. The swords do no damage until launched. If enraged, extra swords are summoned, and they will launch faster.
Ethereal Lance 2 - Summons four evenly spaced waves of swords that travel across the screen, telegraphed by colored beams. The first wave travels from the left side of the screen to the right, the second from right to left, the third wave from top-left to bottom-right, and the fourth wave from top-right to bottom-left.
- If enraged, there will instead be six waves of swords that target specific points around the player instead of traveling from one side of the screen to the other. The first wave travels from the left side of the screen to the right of the player, the second wave from the right side to the left of the player, the third wave from top side to the bottom-right of the player, the fourth wave from top side to bottom-left of the player, the fifth wave from the bottom side to top-right of the player, and the sixth wave from the bottom side to top left of the player.
Note that the boss’s attacks have a set order, which goes as follows;
- Prismatic Bolts
- Dash Attack
- Sun Dance
- Dash Attack
- Everlasting Rainbow
- Prismatic Bolts
- Dash Attack
- Ethereal Lance
- Dash Attack
- Everlasting Rainbow
When the Empress is below 50% HP, she will disappear for a second then reappear above the next estimated location of the player, adopting a new appearance before performing a new pattern of attacks, with slightly shorter delays than before:
- Ethereal Lance 2
- Prismatic Bolts
- Dash Attack
- If enraged, she will cast a modified version of Ethereal Lance after the dash before resuming her normal pattern (targets where the player is rather than where they will be)
- Everlasting Rainbow
- Prismatic Bolts
- Sun Dance
- Ethereal Lance
- Dash Attack
- Prismatic Bolts 2
This boss can also be fought in the day, which will make her “enraged”, making every attack an instakill, but drops the Terraprisma if 100% of damage is dealt during the day.
Note that Expert and Master Mode makes Empress of Light always use her enraged AI, but without the instakill.
It’s completely worth it due to the great weapons such as the Starlight and the Kaleidoscope, so I highly advise fighting her. I generally fight her after Plantera and before Golem, but it’s a rather difficult fight for anybody not used to her.
Lunatic Cultist
![]()
Summoned by killing all the Cultists at the Dungeon entrance
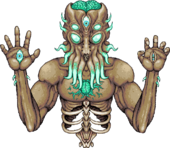
The Lunatic Cultist is a mentally unstable child with cosmic powers with 32,000 / 48,000 / 61,000 HP.
The Lunatic Cultist’s attacks become more powerful as it loses health. The Lunatic Cultist teleports above the player after each attack, cycling between shooting a burst of three homing fireballs (note that they explode on blocks and have a large AoE), creating a ball which shoots lightning at the player (note that it aims directly at you, just like Plantera’s seeds, can be circled to dodge), shooting a giant snowflake which shoots ice shards around it (just run away lol), shooting shadowflames (doesn’t actually inflict Shadowflame for whatever reason, nothing special other than the fact they home slightly), and shooting five Ancient Lights twice in a row (ignore them, they just waste time). The Lunatic Cultist will also create fake copies of itself, which will summon a Phantasm Dragon (literally just a stronger Wyvern) when damaged. If a Phantasm Dragon is still alive and the player damages these copies, it will summon an Ancient Vision (a floating head that charges the player from side to side) instead. Waiting too long to attack the real Lunatic Cultist will also cause the Phantasm Dragon or Ancient Vision to be summoned. These copies can easily be differentiated between by looking at the lighting of the cultists. The real cultist will always have normal lightning.
Note that on Expert and Master Mode, the Lunatic Cultist will spawn Ancient Dooms along with its other attacks. They explode into fragments if not killed quickly, so expect to do a bit of dodging if you decide to ignore them. Note that defeating this boss is needed to get to Moon Lord, so it is a required boss.
Moon Lord
Summoned with a Celestial Sigil or by defeating the Celestial Pillars
The Moon Lord is a big lunar squid man, and drops a majority of the endgame items, such as the Lunar Portal Staff and the Celebration MK2. He also drops Luminite, an ore used to craft all four types of endgame armor and tools. He has a combined health of 145,000 / 217,500 / 277,311, the most health of any boss in the game (I mean, duh).
Moon Lord has two hands and a head which must be killed by attacking the eyes on them, and when killed will release invincible True Eyes of Cthulhu. When the three eyes are destroyed, the Moon Lord’s core opens up on his chest (OuTsIdE hIs RiBs), which must then be destroyed to defeat the boss.
Moon Lord’s hands fire a few wall-piercing ordinary projectiles, shoot two projectiles at once which home onto the player (note that they do not home in on the player if they are above them, they also have a small AoE when hitting you or blocks), and summon Phantasmal Mines and throw them at the player in a wave (just dodge ig). Moon Lord’s top eye will occasionally fire a Phantasmal Deathray that sweeps across the entire screen (note that it doesn’t go all the way around, so a simple Rod of Discord or Hook of Dissonance across dodges it entirely). It goes through walls, so don’t even try that. When the True Eyes of Cthulhu are released, the places where they used to be will inflict minor contact damage (it’s easily ignorable, don’t even worry about dodging them). The True Eyes of Cthulhu will alternate between improved versions of the same attacks, firing a burst of the ordinary projectiles, then circling while firing the homing projectiles in droves, then summoning multiple Phantasmal Mines around them then flinging it at the player, then firing a faster, but less damaging, not wall piercing, and shorter ranged deathray.
Upon defeat it also changes the world icon to have a golden border around it.
Note that Moon Lord’s Phantasmal Deathray attack deals a lot more damage on Expert and Master Mode, enough to kill some players in one hit.
Dark Mage

Event initiated with an Eternia Crystal
The Dark Mage is a mini-boss that appears during the final wave of the Tier 1 Old One’s Army. It has three attacks, from hurling dark energy at the player, to summoning a rune which heals nearby enemies in its vicinity or summoning multiple Old One’s Skeletons around it. Note that the Dark Energy hits like a truck, though the healing rune is basically an opportunity to deal free damage, as there tends to be no targets for it to heal (lol). Its drops are simply great for summoners, being the War Table, the Apprentice’s Scarf, and the Squire’s Shield.
Ogre
Event initiated with an Eternia Crystal
The Ogre is a mini-boss that appears during the final wave of the Tier 2 Old One’s Army. The mini-boss has three attacks, consisting of flinging snot at its targets, inflicting Oozed, leaping in the air creating a damaging shockwave when landing, and swinging its large club at targets in front of it. Note that the club attack and shockwave deal surprisingly high amounts of damage, and being Oozed can be a death sentence if facing the Ogre at close range. Its drops are pretty good for all the classes, being the Phantom Phoenix, Tome of Wisdom, Sleepy Octopod, Monk’s Belt, and Huntress’s Buckler.
Betsy
Event initiated with an Eternia Crystal
Betsy is a boss that appears during the final wave of the Tier 3 Old One’s Army. It attacks in similar manner to Duke Fishron, dashing at the player and spitting a flamethrower. She also has different attacks as well, launching fireballs at its target and summoning two Etherian Wyverns alongside it. Its drops are actually really good, being the Flying Dragon, Sky Dragon’s Fury, Betsy’s Wrath, and Aerial Bane, though it has nothing to offer for summoners besides its wings.
Flying Dutchman
Event initiated with a Pirate Map or can initiate naturally in Hardmode.
The Flying Dutchman is the mini-boss of the Pirate Invasion. It will initially spawn after 65% of the invasion is completed. It spawns various Pirate enemies to attack the player, and has four cannons that fire cannonballs. Similar to the Martian Saucer, these cannons must be destroyed to defeat the boss. The Flying Dutchman does not disappear after the invasion is over. Several Flying Dutchmen can appear at once, though this is rare. Note that it cannot travel through walls, so it’s rather easy to cheese. The Dutchman is generally not worth fighting unless grinding for the Pirate Invasion’s drops, which it has a much higher chance of dropping. These items are the Lucky Coin, the Discount Card, the Gold Ring, the Pirate Staff, the Cutlass, and the Coin Gun.
Mourning Wood

Event initiated with a Pumpkin Moon Medallion at night
Mourning Wood is a mini-boss that spawns during the Pumpkin Moon. It alternates between firing Flaming Wood at the player that pass through walls, and spitting a jet of flaming spikes out of its head which linger on the ground and deal damage on contact. Its only remarkable drops are the Stake Launcher, Spooky Wood, and the Hexxed Branch if on Master Mode.
Pumpking

Event initiated with a Pumpkin Moon Medallion at night
Pumpking is the second and final mini-boss in the Pumpkin Moon. Multiple Pumpkings can be out at the same time. The mini-boss possesses two arms with scythes which swing and fire projectiles at the player, similarly to Skeletron. It cycles through modes of attack from swinging at the player and chasing them (smiling face) to firing jets of flaming spikes (slightly opened mouth), to summoning Flaming Scythes (yawning mouth). Its drops are very much worth the fight, with great gear for all four classes, like the Horseman’s Blade, the Candy Corn Rifle, the Bat Scepter, and the Dark Harvest.
Everscream

Event initiated with a Naughty Presentat night
Everscream is a mini-boss that can be found during the Frost Moon. Its attacks shift between firing a spray of pine needle projectiles (note that they are heavily affected by gravity and do not pierce walls), and dropping bouncing ornaments on the ground that burst into shards. It’s worth it for mages and definitely an option for melee users due to the Razorpine and the Christmas Tree Sword. Those looking for good mobility can also get Festive Wings and the Christmas Hook from it.
Santa-NK1

Event initiated with a Naughty Present at night
Santa-NK1 is a mini-boss that appears during the Frost Moon. It attacks by rapidly firing bullets from its chain gun at the player, launching parachute presents into the air that fall from the sky, and shooting a spray of inaccurate rockets at the player that pass through blocks. Note that he also drops Spiky Balls on the ground that deal massive damage. Fire rate of all attacks also increases as his health lowers. Its face disappears to reveal a robotic one past 50% HP. Nothing really changes other than the usual fire rate increase, though. It’s definitely worth it for rangers, as it drops the Chain Gun and the Elf Melter. Its Master Mode item, the Toy Tank, is also very good.
Ice Queen
Event initiated with a Naughty Present at night
*Ice Queen is the third and final mini-boss that appears during the Frost Moon. Multiple Ice Queens can spawn during the event. Her attacks involve spinning rapidly firing ice bolts in several directions while spinning, shooting multiple ice waves at the player, and hovering above the player while rapidly dropping ice bolts. Note that all of her projectiles inflict Chilled and Frozen, so getting hit just once can often lead to a rather frozen fate. I don’t think it’s that worth it as a summoner, but for the other classes, her weapons can be rather good, being the North Pole, Snowman Cannon, and the Blizzard Staff.
Martian Saucer

Event initiated by letting a Martian Probe escape after a player is detected
The Martian Saucer is a large flying mini-boss that spawns during the Martian Madness event. It has one (two on Expert/Master Mode) phase, the first phase requiring its turrets to be destroyed before its core can be damaged. During its first phase, the saucer cycles through three attacks, wherein it either fires a barrage of lasers at the player, fires homing rockets or attempts to disintegrate the player with a deathray from its bottom. In Expert or Master Mode, once the turrets have been downed, it begins to quickly chase the player, rapidly sweeping and firing its death ray. Note that when a turret is defeated, lingering shrapnel begins raining down from the place where the turret was. The shrapnel goes through platforms, so it’s not much of a concern to most. The loot is honestly pretty worth it, and with practice, it’s not actually that difficult.
Solar Pillar
Event initiated by defeating Lunatic Cultist
The Solar Pillar attacks the player directly by firing gravity-affected Solar Blasts into the air, aimed at the player. The enemies that spawn are naturally melee themed. As with the other pillars, it is surrounded by an impenetrable force field that is only broken when 100 of its minions are slain. Once the force field is broken, the player can attack the pillar at will.
The Solar Pillar spawns the following enemies:
Nebula Pillar

Event initiated by defeating Lunatic Cultist
The Nebula Pillar is the only pillar that does nothing to help its minions or attack the player. The enemies that spawn are naturally mage themed. As with the other pillars, it is surrounded by an impenetrable force field that is only broken when 100 of its minions are slain. Once the force field is broken, the player can attack the pillar at will.
The Nebula Pillar spawns the following enemies:
Vortex Pillar

Event initiated by defeating Lunatic Cultist
The Vortex Pillar directly attacks the player by summoning Lightning Portals above the player. The enemies that spawn are naturally ranger themed. As with the other pillars, it is surrounded by an impenetrable force field that is only broken when 100 of its minions are slain. Once the force field is broken, the player can attack the pillar at will.
The Vortex Pillar spawns the following enemies:
Stardust Pillar
Event initiated by defeating Lunatic Cultist
The Stardust Pillar itself doesn’t attack the player at all, but rather summons Stardust enemies directly. The enemies that spawn are naturally summoner themed. As with the other pillars, it is surrounded by an impenetrable force field that is only broken when 100 of its minions are slain. Once the force field is broken, the player can attack the pillar at will.
The Stardust Pillar spawns the following enemies: